 Editing tools
In this chapter, we discuss some of the general editing facilities
that are implemented in TeXmacs. Of course, this includes basic
operations that can also be found in other editors: “cut and
paste”, “search and replace”, etc. But, more
interestingly, some of these facilities take advantage of the
additional structure of TeXmacs documents. Typical examples of
“structured editing features” are “structured cursor
movement” and “structured variants”. Traditional
operations such as “search and replace” also attempt to
exploit the document structure. For instance, when searching  in math mode, you will only find matches that are also
in math mode.
in math mode, you will only find matches that are also
in math mode.
1.Cut and paste
You can select text and formulas by maintaining the left mouse button.
In order to delete the selected region, use
It is also possible to change the text properties of a selected
region. For instance, in order to transform some black text in red,
you select it using the left mouse button and click on
When using the copy and paste mechanism to communicate with other
applications, text is copied and pasted using the TeXmacs data format.
You may specify other import and export formats using
By default, copying and pasting uses the “primary
clipboard”. Using the remaining entries in the
There are two ways to make selections using the keyboard. When using
the cursor keys  ,
,  , etc. while holding down the Shift+
button, you may select text while moving around the cursor.
Alternatively, you may press Ctrl+Space once to
fix a starting position. When moving around using the cursor keys, the
text between the starting position and the current position keeps
being selected. The selection gets cleared by pressing Ctrl+G.
, etc. while holding down the Shift+
button, you may select text while moving around the cursor.
Alternatively, you may press Ctrl+Space once to
fix a starting position. When moving around using the cursor keys, the
text between the starting position and the current position keeps
being selected. The selection gets cleared by pressing Ctrl+G.
Notice that the Ctrl+Space shortcut also allows you to make structured selections. You may select the current word you are in by pressing Ctrl+Space twice. Each additional time you press Ctrl+Space results in the selection of the smallest structure that englobes the current selection. Ultimately, when the entire document gets selected, pressing Ctrl+Space once more clears the selection.
2.Search and replace
You can start searching text by pressing Ctrl+S or
 and
and  , or Return).
Using Home and End, you may
jump to the first and last occurrences respectively. As soon as you
press the escape key Meta+, the search toolbar
will be closed, searching stops and focus returns to the main
document.
, or Return).
Using Home and End, you may
jump to the first and last occurrences respectively. As soon as you
press the escape key Meta+, the search toolbar
will be closed, searching stops and focus returns to the main
document.
During a search, TeXmacs only looks for text in the same mode and
language as at the position where you started your search. In other
words, when searching an in math-mode, you
will not find any x's in the ordinary text. As a current limitation,
the search string on the search toolbar can only contain ordinary text
and no math-symbols or more complicated structured text. More complex
searches will be discussed below.
In order to replace text, you should use
The search and replace toolbars are quite rudimentary in the sense
that they only allow for searching and replacing plain text. By
pressing the  icon on either of these toolbars,
you may expand the toolbar into a full blown widget with larger search
and replace fields that may contain arbitrary markup. Searching and
replacing can be done using more or less the same keyboard shortcuts
as in the case of the toolbars, but you may now search and replace
arbitrary content.
icon on either of these toolbars,
you may expand the toolbar into a full blown widget with larger search
and replace fields that may contain arbitrary markup. Searching and
replacing can be done using more or less the same keyboard shortcuts
as in the case of the toolbars, but you may now search and replace
arbitrary content.
When searching non textual content, the conditions for having a hit
are somewhat released. For instance, assume that you are just starting
a new search with an empty search field. Then typing F6
inserts the  , TeXmacs will highlight all fractions in which the
numerator contains the variable . Yet another
example: a search for
, TeXmacs will highlight all fractions in which the
numerator contains the variable . Yet another
example: a search for  will highlight all
formulas in which the denominator contains a square root that contains
the variable . For instance, the fraction
will highlight all
formulas in which the denominator contains a square root that contains
the variable . For instance, the fraction  will be highlighted, but not
  .
.
When using the structured text and replace widgets, TeXmacs also
implements a few additional special tags for enhancing structured
searching. First of all, it can happen that you would like to search
for certain content inside a special context. For instance,
you might want to search for all occurrences of the letter
“a” inside a , 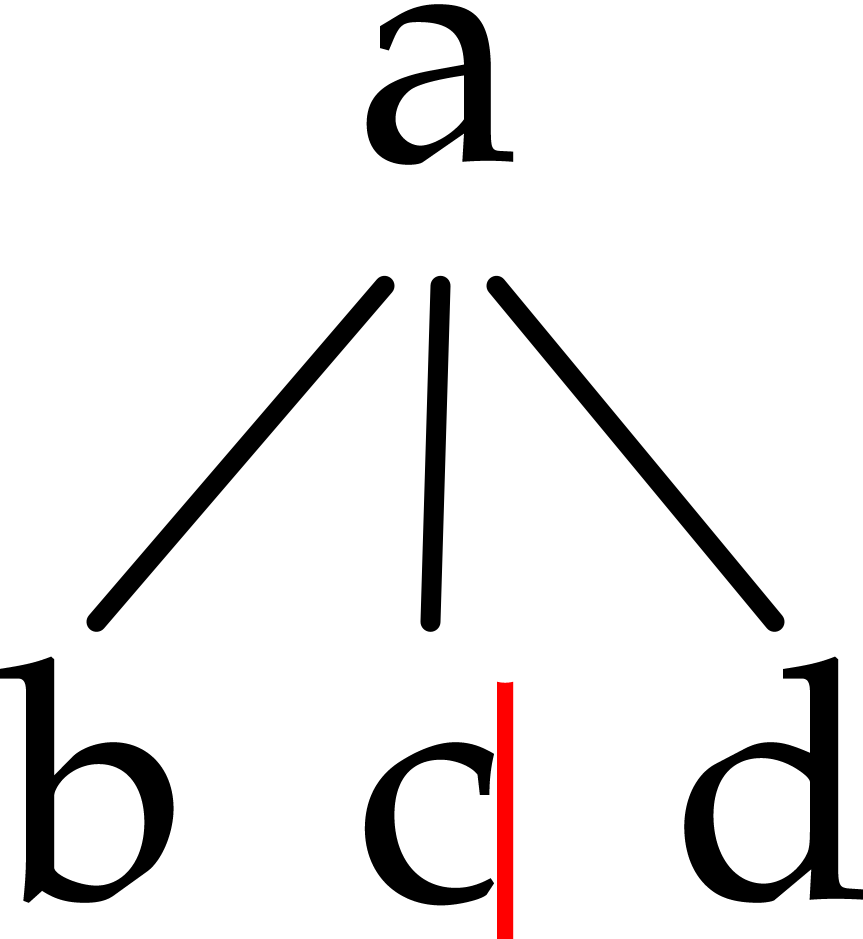 and
and 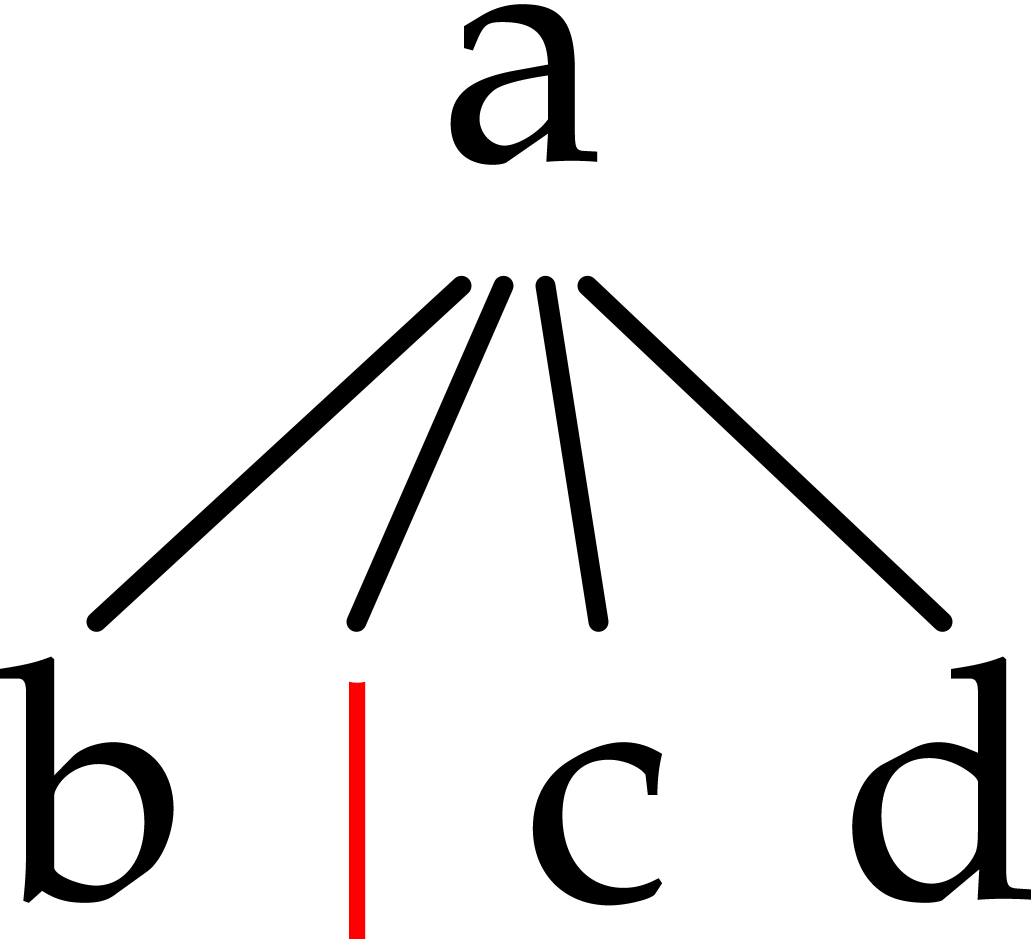 , which are entered
using Ctrl+1, Ctrl+2 and Ctrl+3.
, which are entered
using Ctrl+1, Ctrl+2 and Ctrl+3.
As soon as you start using the structured text and replace widgets
instead of the toolbars, this will be remembered as a user preference:
any subsequent searches or replacements will again use the widgets. In
order to switch back to the less intrusive toolbar methods for
searching and replacing, you should press the 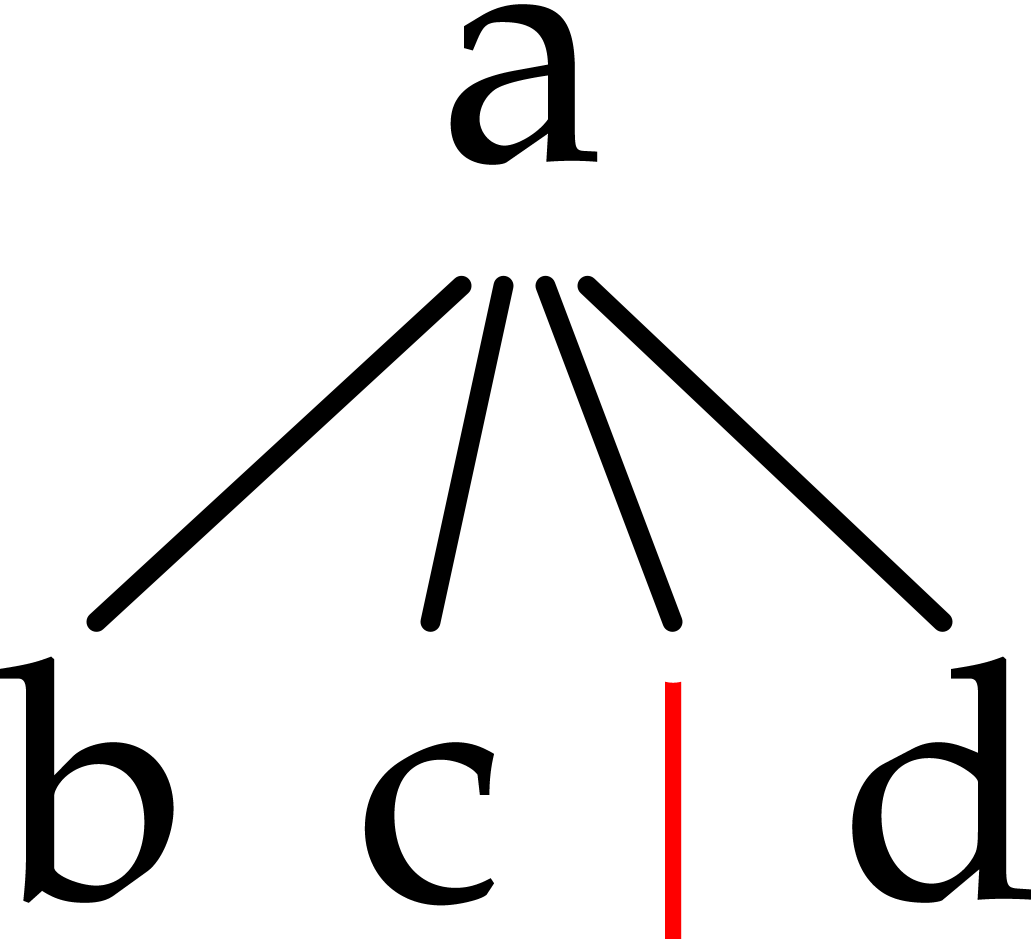 icon.
icon.
3.Spell checking
If the program ispell has been installed on your
system, then you may use it to check your text for misspelled words by
pressing Meta+$ or
When you launch the spell checker (either on the whole text or on a selected region), you will be prompted at each misspelled word and the footer displays the available options:
- a)
-
Accepts the misspelled word and all its future occurrences in the text.
- r)
-
Replace the misspelled word by a correction that you have to enter.
- i)
-
Indicate that the “misspelled” word is actually correct and that it has to be inserted in your personal dictionary.
- 1-9)
-
Several suggested corrections for your misspelled word.
Notice that ispell just checks for misspelled words. No grammatical faults will be detected.
When starting the spell checker, it will use the dictionary of the language that is active at the current cursor position (or the start of a selection). Only text in that language will be checked. If your document contains text in several languages, then you will have to launch the spell checker once for each language being used.
4.Undo and redo
It is possible to gradually undo the changes you made in a document
from the moment that you launched TeXmacs. This can be done via
We notice that only changes in the document itself are taken into account by the undo system. In particular, modifications of most of the global document properties can not be undone. This includes modifications of the document style, the page size, the main font, etc. The same remark applies to any modifications outside TeXmacs that were triggered by your actions. For instance, in a computer algebra session, you can undo your edits inside TeXmacs, but not the computations in the external computer algebra system.
5.Structured editing
As a general rule, the behaviour of most structured editing operations is conditioned by the current focus. By default, the focus is on the innermost tag that contains the cursor. Whenever some selection is active, the focus is rather on the innermost tag that contains the selection. During structured operations, such as navigating among similar tags, the focus may temporarily be set to something else. The current focus is visually indicated by the innermost cyan box around the cursor.
For instance, the structured insertion commands Meta+, Meta+, Meta+
and Meta+ have a
particular meaning both inside tables and trees. Inside tables, they
allow you to insert new rows and columns (see figure ?).
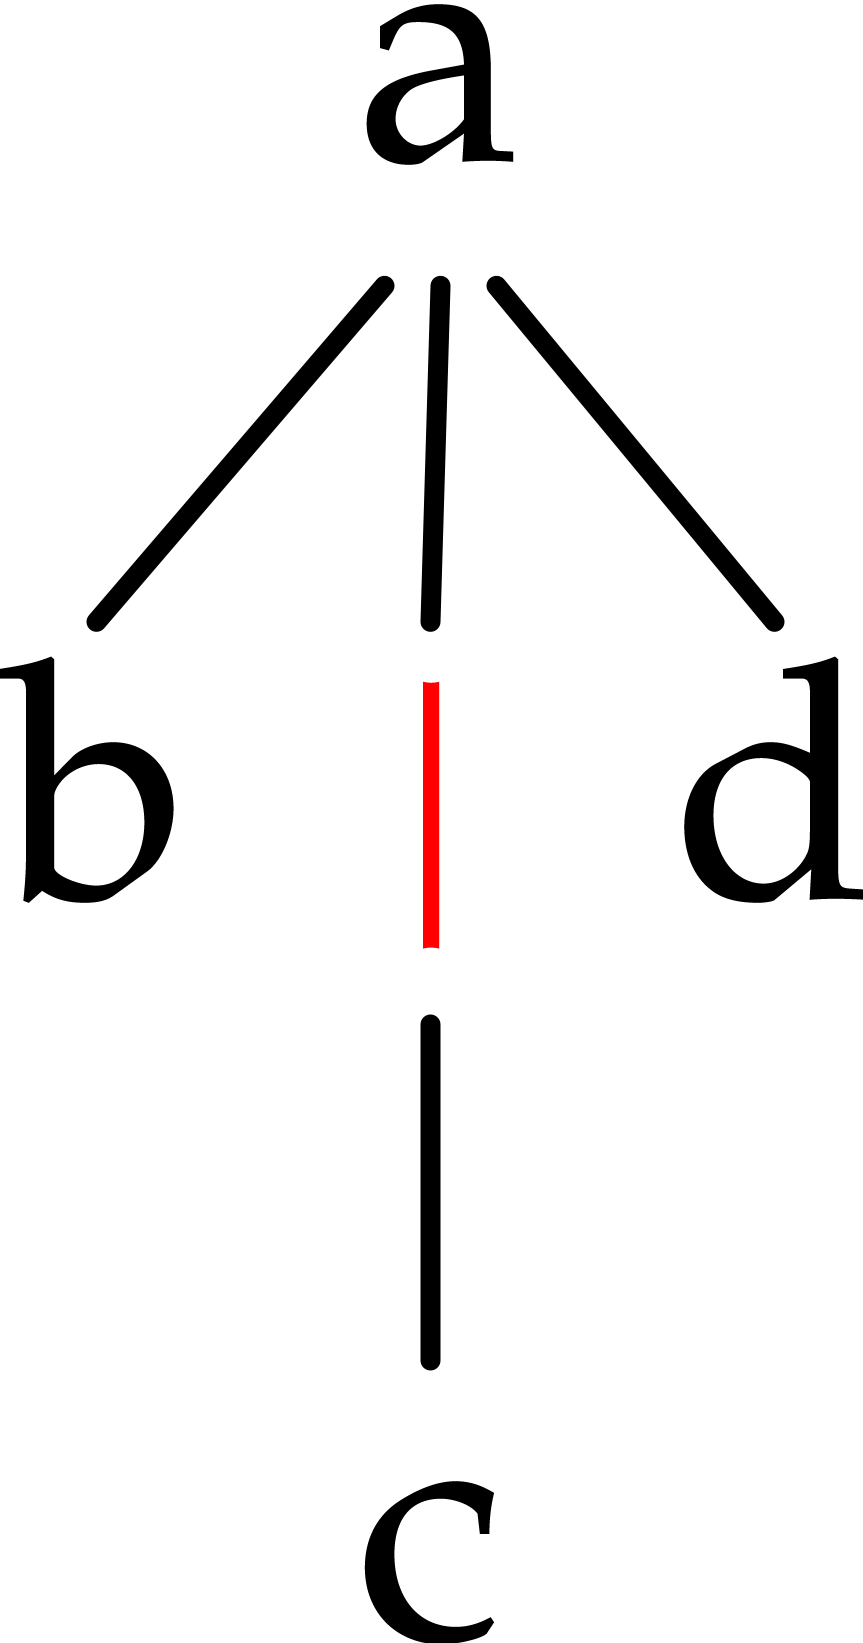
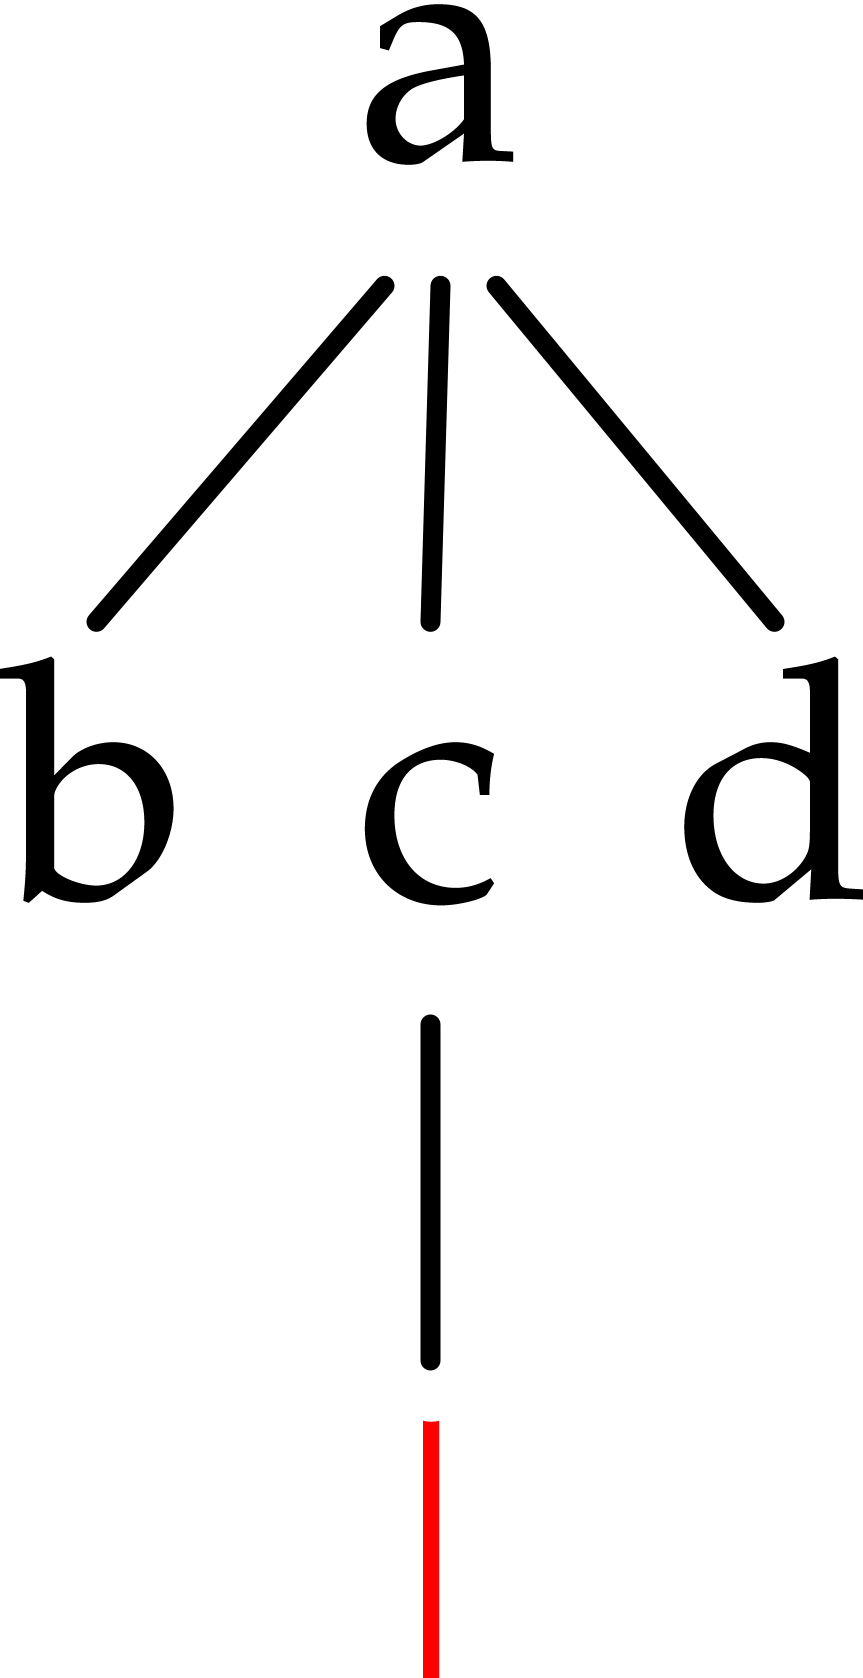
Inside trees, they correspond to the insertion of new nodes (see
figure ?). If you are inside a tree inside a table, then
the innermost tag is a tree, and node insertions will take precedence
over the insertion of new rows and columns.
For most editing operations, a “default particular
behaviour” has been defined. This behaviour may potentially be
overridden for a few exceptional tags. In our example of structured
insertion, the default behaviour of Meta+ and Meta+ is to insert a new argument to the tag at the left
or at the right of the cursor (when allowed). Inside tables, this
behaviour is overridden so as to insert entire columns.
|
     |
Similarly, still in the case of matrices, the keys Meta+Home, Meta+End, Meta+PageUp and Meta+PageDown can be used for inserting a new first or last column, resp. a new first or last row. The keys Alt+Backspace and Alt+Delete are mapped to the commands for backward resp. forward structured deletion. For matrices, this will result in the removal of the column before or after the cursor (see figure ?). In order to remove the enclosing environment you may use Ctrl+Backspace or Ctrl+Backspace.

 at the right-hand side.
6.Structured cursor movement
TeXmacs implements the three main mechanisms for structured cursor movement:
-
Traversal of the entire structure of the document.
-
Traversal of tags that are similar to the innermost tag.
-
Movements inside the innermost tag.
Most keyboard shortcuts for structured cursor movements can be used in combination with the Shift+-key so as to simultaneously select text while moving around.
Structured traversal of the document
The ?, ?, Ctrl+ and Ctrl+ keys are used for the structured traversal
of the entire document. Inside plain text, ?
and ? allow you to move in a word-by-word
manner, whereas Ctrl+
and Ctrl+ correspond
to paragraph-by-paragraph motion.
In the presence of other markup, the ? and
? keys allow you to visit all accessible
cursor positions in the document, except that we keep moving in a
word-by-word manner inside plain text. The behaviour of the Ctrl+ and Ctrl+ keys is more context-dependent. Inside
matrices, they typically allow you to move one row up or down.
Traversal of tags that are similar to the innermost tag
This type of cursor movement allows you to quickly visit all other tags in the document that are similar to the innermost tag. The Ctrl+PageUp and Ctrl+PageDown keys allow you move to the previous or next similar tags, whereas ? and ? directly jump to the first or last similar tags.
For instance, if you are inside a section title, then you may move to the previous sectional title using Ctrl+PageUp. Subsection and chapter titles are in particular understood to be “similar” to section titles. Notice that you may use Ctrl+§ to jump to the previous section title.
Movements inside the innermost tag
It is also possible to quickly move inside the innermost tag without
quitting it. The shortcuts Meta+Alt+, Meta+Alt+, Meta+Alt+Home and Meta+Alt+End
provide a way to move to the previous, next, first or last argument of
the innermost tag. Furthermore, the shortcuts Meta+Alt+Backspace
and Meta+Alt+Delete may be used to exit the
innermost tag on the left or on the right.
This default behaviour may be overridden in special contexts. For
instance, inside tables or trees, they rather correspond to
cell-by-cell or node-by-node cursor movement. In addition, these cases
associate vertical cursor movements to Meta+Alt+, Meta+Alt+, Meta+Alt+PageUp and Meta+Alt+PageDown.
7.Structured variants
When creating an environment like a theorem, an equation or a list, it frequently happens that one would like to change the environment a posteriori. The keyboard shortcuts Ctrl+Tab and Ctrl+Shift+Tab allow you to cycle through the list of structured variants of the innermost tag, in forward or backward direction, respectively.
For instance, assuming that you are inside a theorem, pressing Ctrl+Tab several times will change the theorem into a
proposition, a lemma, a corollary, a conjecture, and finally back into
a theorem. The Ctrl+Shift+Tab key allows you to
cycle in the reverse direction: theorem
conjecture corollary
lemma proposition
theorem.
In the case of mathematical formulas, the Ctrl+Tab
shortcut allows you to change an inline formula such as  into the displayed formula

while taking care of potential “trailing spaces and punctuation signs”.
TeXmacs also provides the Ctrl+# shortcut for turning numbered environments into unnumbered environments and vice versa. This works for most common environments like theorems, remarks, tables, equations, etc. Notice that Ctrl+# also turns an unnumbered itemize environment into an enumeration and vice versa, whereas Ctrl+Tab allows you to cycle between the available kinds of list items (bullets, dashes, arrows, etc.).
Folding and unfolding provides yet another example of an interesting way to toggle between several environments. Inside a computer algebra session such as
factor (x^15 - 1)
Pari]

you may click on “Pari]”
in order to fold the output (only the input remains visible) and click
once again in order to unfold back to the original state. The Ctrl+* shortcut achieves the same effect. There various
other foldable environments, most of which are available through
8.Positioning and resizing objects
The Meta+Ctrl+ prefix may be used for positioning
and resizing objects. For instance, inside a cell of a table, you may
use Meta+Ctrl+ to
align the cell more to the right. Behind a space introduced
via
-
Meta+Ctrl+
-
Decrease the horizontal size of an object, or align more to the left.
-
Meta+Ctrl+
-
Increase the horizontal size of an object, or align more to the right.
-
Meta+Ctrl+
-
Decrease/increase the vertical size of an object, or align more to the bottom.
-
Meta+Ctrl+
-
Increase/decrease the vertical size of an object, or align more to the top.
- Meta+Ctrl+Home
-
Decrease the horizontal offset of an object, or left align.
- Meta+Ctrl+End
-
Increase the horizontal offset of an object, or right align.
- Meta+Ctrl+PageDown
-
Decrease the vertical offset of an object, or align at the bottom.
- Meta+Ctrl+PageUp
-
Increase the vertical offset of an object, or align at the top.
- Meta+Ctrl+Backspace
-
Revert the geometry (size, position, alignment) to the defaults.
- Meta+Ctrl+Tab, Meta+Ctrl+Shift+Tab
-
Circulate among the available length units for specifying the geometry.
- Meta+Ctrl+[, Meta+Ctrl+]
-
Decrease or increase the step size when positioning or resizing.
Particular tags to which the shortcuts apply are the following:
- Spaces
-
Both horizontal and vertical spaces from the
Format →Space menu. You should put the cursor just after the space tag for the shortcuts to apply. - Box modifiers
-
The tags
move ,shift ,resize ,extend ,clipped ,smashed ,inflate from theFormat →Adjust menu. - Animations
-
The durations of animations can be modified using Meta+Ctrl+
and Meta+Ctrl+.
- Images
-
The size and alignment of images can be changed.
9.Versioning tools
When writing documents in collaboration with other authors, it
frequently arises that one wants to go through changes made by the
other authors, and either accept, discard or further correct them.
After enabling the versioning tool through
In addition, there exist many stand-alone programs for maintaining
several versions of a same file, such as
Comparing two versions
Assume that we have two versions old.tm and new.tm
of the same document. In order to see the changes, first load the
newer version new.tm, then click on
It is possible to go through all the differences between the old and
new versions either from the items in the submenu and Ctrl+. One may also use
the more general structured navigation shortcuts ?,
?, Ctrl+PageUp and
Ctrl+PageDown.
Visualization of the differences
Differences between the two versions can be displayed in three ways: by showing only the old version, only the new version, or both versions simultaneously. In all cases, the old version is displayed in dark red and the new version in dark green.
The visualization style can be specified individually for each
individual change, via (old version), Ctrl+ (new version) and
Ctrl+| (both versions). One may also cycle through
the different style using the structured variant key Ctrl+Tab.
If you selected some text, then the above actions will apply to the
whole selection. In particular, by selecting the entire file, you can
visualize the older or the newer version, or both versions.
Retaining a specific version
It often occurs that we want to go through the changes between two
versions and progressively retain either one or the other version for
each individual difference. Assuming that the cursor is inside a given
difference, this can be done from entries in the submenu
If you selected some text, then any of the above action will retain
the appropriate version for each of the differences in the selection.
This applies in particular to the case when you select the entire
document. A convenient alternative way to process all differences is
to use Ctrl+ and
Ctrl+ to go through
the differences, use Ctrl+
and Ctrl+ to select
the preferred version. As soon as all differences have been processed,
you select the entire document and click on
Grain control and reactualizing the differences
The entries in the submenu
The grain is used when comparing two documents using
Notice that you may also “change” the grain to the current grain. This has the effect of reactualizing the differences of a selected portion or of the current difference at the cursor position. This may be useful, if you made some changes to one of the versions. For instance, assume that the old version contained a theorem and that we changed it into a lemma in the new version and also modified part of its inside text. When visualizing the changes, the whole theorem will be highlighted, since there is no appropriate markup to indicate that we just changed from a theorem to a lemma. Nevertheless, if we want to compare the inside texts, we may turn the old theorem into a lemma and then reactualize.
Using external programs such as Subversion
for version control
If the file you are editing belongs to a directory that is under
version control (only
First of all, if the current buffer is under version control, then you
may take a look at its history using
After making some changes to a file under version control, the version
inside the editor or on disk no longer corresponds to the version in
the repository. Using
If, while you were editing, changes to the file were made in the
repository, then you may merge the result with your current version
using