 Writing simple documents
1.Generalities for typing text
The usual English characters and punctuation symbols can easily be obtained on most keyboards. Most modern system also implement standard shortcuts in order to obtain accented characters and other special symbols. If necessary, accented characters can also be obtained using the Meta+ prefix. For instance, “é” is obtained by typing Meta+'E. Similarly, we obtain “à” via Meta+‘A and so on.
Long words at borders of successive lines are automatically
hyphenated. In order to hyphenate foreign languages correctly, you
should specify the language of the document in the menu
At the left hand side of the footer, you see the document style, the
text properties at the current cursor position. Initially, it displays
“generic text roman 10”, which means that you type in text
mode using a 10 point roman font and the generic document style. You
can change the text properties (font, font size, color, language) in
the
At the right hand side of the footer, the character or object (like a change in the text properties) just before the cursor is displayed. We also display all environments which are active at the cursor position. This information should help you to orient yourself in the document.
2.Typing structured text
Usually, long documents have a structure: they are organized in
chapters, sections and subsections, they contain different types of
text, such as regular text, citations, footnotes, theorems, etc. After
selecting a document style in
Currently, several standard document styles have been implemented: generic, article, book, letter, exam, beamer, seminar, source. For instance, the article style can be used for writing articles. Besides, there are styles for common journals and special purposes, such as the TeXmacs documentation.
As soon as you have selected a document style, you can organize your
text into sections (see
When you get more acquainted with TeXmacs, it is possible to add your own new environments in your own style file. Assume for instance that you often make citations and that you want those to appear in italic, with left and right margins of 1cm. Instead of manually changing the text and paragraph properties each time you make a citation, it is better to create a citation environment. Not only it will be faster to create a new citation when doing so, but it is also possible to systematically change the layout of your citations throughout the document just by changing the definition of the citation environment. The latter situation occurs for instance if you discover a posteriori that you prefer the citations to appear in a smaller font.
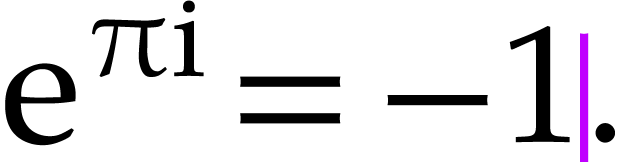
There are a few general editing principles which make it easy to manipulate structured documents using TeXmacs. One major concept is the current focus, which is best illustrated on an example. Assume that we are in the process of entering a classical theorem:
The following theorem is due to
|
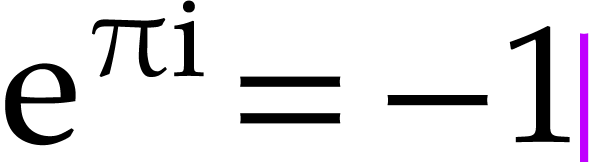
At the position of the cursor, the grey and cyan boxes indicate the
active tags: in this case, the cursor is both inside a theorem and a
formula. The innermost active tag (the formula  in our example) is surrounded by a cyan box and called the current
focus.
in our example) is surrounded by a cyan box and called the current
focus.
The contents of the
The following theorem is due to
|
Similarly, the arrow buttons on the left hand side of the focus toolbar allow you to jump to similar tags. In this case, they will allow you to quickly traverse all formulas and equations in your document. For more information on “structured editing operations” we refer to the chapter on editing tools.
A second important concept is the current editing mode.
Currently, there are five major modes: text mode, mathematics mode,
program mode, graphics mode and source mode. In principle, the current
mode can be determined from the current focus, but the mode is likely
to change less often than the focus. The mode dependent
toolbar above the focus toolbar contains several buttons which
are useful in the current mode. The contents of the
3.Content-based tags
The simplest examples of structure in a text are content-based tags.
In
|
||||||||||||||||||||||||||||||||||||||||||
4.Lists
Using  (bullets),
  (dashes) or
  (arrows) to indicate
entries in the list or the default tag. Lists may be nested
inside other tags, like in the following list:
(arrows) to indicate
entries in the list or the default tag. Lists may be nested
inside other tags, like in the following list:
-
First item.
-
Now comes the sublist:
-
A subitem.
-
Another one.
-
-
A final item.
The default tag is rendered in a different way depending on the level
of nesting. At the outermost level, we used the
tag, at the second level  , and so on. When you
are inside a list, notice that pressing Return
automatically starts a new item. If you need items which are several
paragraphs long, then you may always use Shift+Return
in order to start a new paragraph.
, and so on. When you
are inside a list, notice that pressing Return
automatically starts a new item. If you need items which are several
paragraphs long, then you may always use Shift+Return
in order to start a new paragraph.
Enumerate environments, which are started using
-
A first item.
-
A second one.
-
And a last one.
The last type of lists are descriptive lists. They are started using
- Gnu
-
A hairy but gentle beast.
- Gnat
-
Only lives in a zoo.
5.Environments
In a similar way as content-based tags, environments are used to mark
portions of text with a special meaning. However, while content-based
tags usually enclose small portions of text, environments often
enclose portions that are several paragraphs long. Frequently used
environments in mathematics are
 ,
,  ,
,
 and
and  with
with  , such that
  .
.

You may enter environments using
 .
.
Other frequently used environments with a similar rendering as
theorems, but which do not emphasize the enclosed text, are
6.Layout issues
As a general rule, TeXmacs takes care of the layout of your text.
Therefore, although we did not want to forbid this possibility, we do
not encourage you to typeset your document visually. For instance, you
should not insert spaces or blank lines as substitutes for horizontal
and vertical spaces between words and lines; instead, additional space
should be inserted explicitly using
Several types of explicit spacing commands have been implemented. First of all, you can insert rigid spaces of given widths and heights. Horizontal spaces do not have a height and are either stretchable or not. The length of a stretchable spaces depends on the way a paragraph is hyphenated. Furthermore, it is possible to insert tabular spaces. Vertical spaces may be inserted either at the start or the end of a paragraph: the additional vertical space between two paragraphs is the maximum of the vertical space after the first one and the vertical space before the second one (contrary to TeX, this prevents from superfluous space between two consecutive theorems).
As to the paragraph layout, the user may specify the paragraph style (justified, left ragged, centered or right ragged), the paragraph margins and the left (resp. right) indentation of the first (resp. last) line of a paragraph. The user also controls the spaces between paragraphs and successive lines in paragraphs.
You can specify the page layout in the
7.The font selection system
In TeXmacs, the global document font can be specified using
- Family
-
Fonts are grouped together into families with a similar design.
- Shape
-
Inside the same font family, individual fonts have different shapes, such as bold, italic, small capitals, etc.
- Size
-
The font size in points.
The user may directly specify these three characteristics in the font browser, which also displays some sample text for the selected font.
The font browser also provides a way to quickly select fonts based on desirable font properties. For instance, by filtering on a “bold weight” and “sans serif”, one may find a bold sans serif font which mixes as well as possible with the main font. TeXmacs allows you to filter on the following criteria:
- Weight
-
The font weight corresponds to the “thickness” of the font:
Thin Light Medium Bold Black - Slant
-
The font slant determines the angle of the font:
Normal Italic Oblique - Stretch
-
This property determines the horizontal width for a fixed vertical height:
Condensed Unextended Wide - Case
-
This property determines how lowercase letters are capitalized:
Mixed Small capitals - Serif
-
This feature corresponds to the projecting features called “serifs” at the end of strokes:
Serif Sans Serif - Spacing
-
This feature corresponds to the horizontal spacing between characters:
Proportional Monospaced - Device
-
This property can be used to imitate specific “writing devices”:
Print Typewriter Digital Pen Art pen Chalk Marker - Category
-
Various other font features:
Ancient Attached Calligraphic Comic Decorative Distorted Gothic Handwritten Initials Medieval Miscellaneous Outline Retro Scifi Title
Each of the above properties really constitutes a hint on how
the kind of font which should be used. If no suitable font
can be found on your particular system, then setting these properties
may have no effect. Whenever you apply one or more filters, the font
browser indicates which fonts match the selected properties. It also
indicates the closest match for the current font in use. When pressing
the
It should be noticed that TeXmacs comes with a limited number of preinstalled fonts, such as the Stix fonts and several fonts prefixed by “TeXmacs”. Documents which only use these fonts will be rendered the same on different systems (assuming the same version of TeXmacs). When your documents contain other fonts as well, then these fonts may be replaced by closest matches when opening your document under a different operating system.
8.Mastering the keyboard
We recall that the section on general conventions contains explanations on the way keyboard shortcuts are printed in this manual. It may also be useful to take a look at the section on keyboard configuration.
8.1.General prefix rules
Since there are many keyboard shortcuts, it is important to have some
ways of classifying them in several categories, in order to make it
easier to memorize them. As a general rule, keyboard shortcuts which
fall in the same category are identified by a common prefix. The
active prefixes heavily depend on the selected “look and
feel” in
- Ctrl+
-
Standard shortcuts, which are similar to shortcuts used by other applications (for the selected look and feel). For instance, Ctrl+V can be used for pasting text on your system.
- Alt+
-
TeXmacs shortcuts, which often rely on the current editing mode. For instance, Alt+S produces strong text in text mode and a square root
 in math mode.
- Meta+
-
Compound TeXmacs shortcuts. Usually, these shortcuts first indicate the kind of markup to which the command will apply and then specify the specific command. For instance, the Meta+E prefix is used for inserting executable markup, which is useful for writing style files. One example is the shortcut Meta+E+ for the insertion of an addition.
- Meta+Ctrl+
-
This prefix is used in combination with arrow keys and certain other special keys for positioning and resizing objects
- Meta+Alt+
-
This prefix is used in combination with arrow keys and some other special keys for structured cursor movements.
- Alt+Ctrl+
-
This prefix is occasionally used in combination with letters and punctuation symbols for creating some additional easy to remind shortcuts.
- Shift+F5
-
This prefix can be used in combination with normal letters for the insertion of special symbols. For instance, Shift+F5S yields ß and Shift+F5A yields
 . The Shift+F5
prefix is also used for the insertion of “literal
characters”. For instance, Shift+F5\ will always produce the \ character, whereas the
\ key is used for entering hybrid
commands.
. The Shift+F5
prefix is also used for the insertion of “literal
characters”. For instance, Shift+F5\ will always produce the \ character, whereas the
\ key is used for entering hybrid
commands.
Unfortunately, Meta+-based shortcuts are
superseded by system shortcuts on several systems. For instance,
accented characters and common special symbols are entered using this
prefix under
8.2.Keyboard shortcuts for text mode
To write a text in an european language with a keyboard which does have the appropriate special keys, you can use the following shortcuts to create accented characters. Note that they are active regardless of the current language setting.
|
||||||||||||||||||||||||||||||||||||||||||||||||||||||||
Special characters can also be created in any language context:
|
||||||||||||||||||||||||||||||||||||||||
When you press the " key, an appropriate
quote will be inserted. The quote character is chosen according to the
current language and the surrounding text. If the chosen quoting style
is not appropriate, you can change it in
“English” quotes are considered ligatures of two successive backticks or apostrophes. They can be created with ‘‘ and '' but these are not actual keyboard commands: the result is two characters displayed specially, not a special single character.
Some shortcuts are available in specific language contexts. You can
set the text language for the whole document with
|
||||||||||||||||||||||||||||||||||||||||||||||||||||||||||||||||||||||||||||||||||||||||
Language-specific shortcuts override generic shortcuts; for example, you cannot easily type “ø” in hungarian context.
8.3.Hybrid commands and LaTeX simulation
TeXmacs allows you to enter LaTeX commands directly from the keyboard as follows. You first hit the \-key in order to enter the hybrid LaTeX/TeXmacs command mode. Next you type the command you wish to execute. As soon as you finished typing your command, the left footer displays something like
<return>: action to be undertaken
When you hit the Return-key at this stage, your command will be executed. For instance, in math-mode, you may create a fraction by typing \FRACReturn.
If the command you have typed is not a (recognized) LaTeX command, then we first look whether the command is an existing TeXmacs macro, function or environment (provided by the style file). If so, the corresponding macro expansion, function application or environment application is created (with the right number of arguments). Otherwise, it is assumed that your command corresponds to an environment variable and we ask for its value. The \-key is always equivalent to one of the commands Meta+IL, Meta+IE, Meta+IA, Meta+I# or Meta+IV.
To insert a literal \ (backslash) character, you can use the Shift+F5\ sequence.
8.4.Dynamic objects
Certain more complex objects can have several states during the editing process. Examples of such dynamic objects are labels and references, because the appearance of the reference depends on a dynamically determined number. Many other examples of dynamic markup can be found in the documentation about writing style files.
When entering a dynamic object like a label using Meta+!, the default state is inactive. This inactive state enables you to type the information which is relevant to the dynamic object, such as the name of the label in our case. Certain dynamic objects take an arbitrary number of parameters, and new ones can be inserted using Tab.
 label
label pythagoras
When you finished typing the relevant information for your dynamic object, you may type Return in order to activate the object. An active dynamic object may be deactivated by placing your cursor just behind the object and hitting Backspace.
8.5.Various useful keyboard shortcuts
Some assorted shortcuts which are often useful are displayed in table
?. Notice that spaces inserted using SpaceTabTab, Meta+Space
and Meta+Shift+Space can be resized a
posteriori using the shortcuts Meta+Ctrl+ and Meta+Ctrl+. This kind of resizing actually works for
more general horizontal and vertical spaces inserted from the menu
and Meta+Ctrl+. This kind of resizing actually works for
more general horizontal and vertical spaces inserted from the menu
|
||||||||||||||||||||||